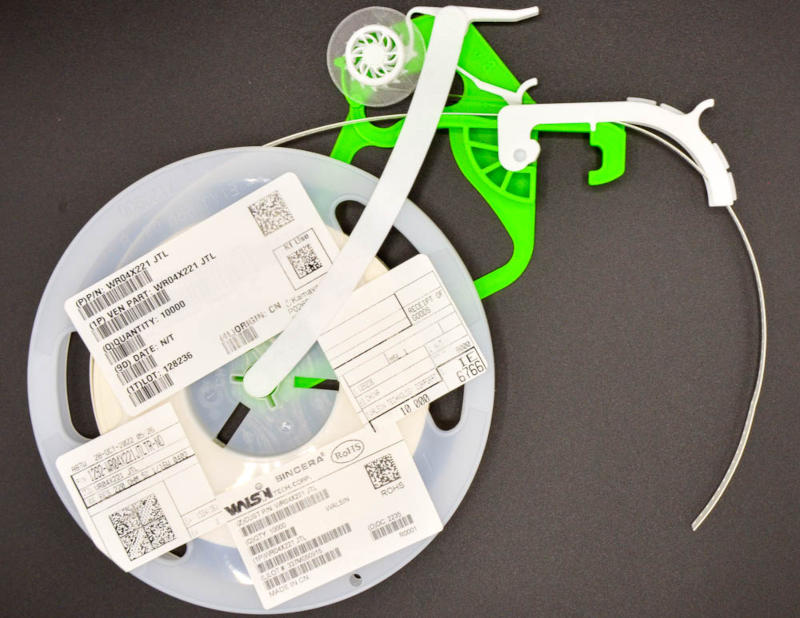
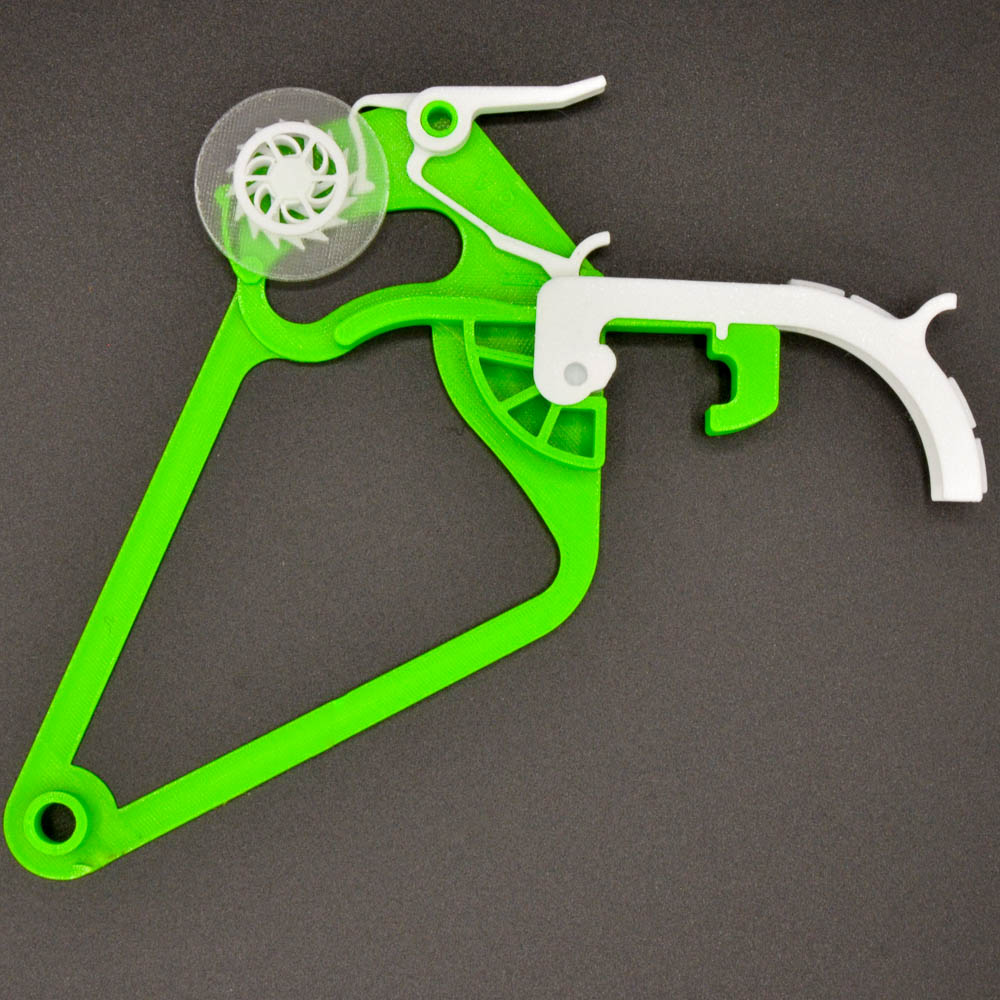
I’ve continued to refine my PnP semi-automated feeder based on personal experience with my own OpenPnP machine. It still relies on the mechanical energy from a lever actuated by the picking head to both advance the carrier tape and to peel off and take-up the cover tape. This is slower than a self-actuated feeder, but much cheaper and easier to implement.
Like earlier designs, this version was designed for ease of manufacture. Components are kept small enough to permit the use of smaller 3D printers (190 mm x 190 mm minimum bed size). I’ve endeavored to remove as many screws and springs from the design as possible, relying instead on 3D printed parts which are easier to source. After having extensive licensing trouble with my Fusion 360 Start-up license (month+, finally resolved), the feeder design has been completely switched to FreeCAD so everyone can easily edit it.
Cover Tape Take-Up Changes
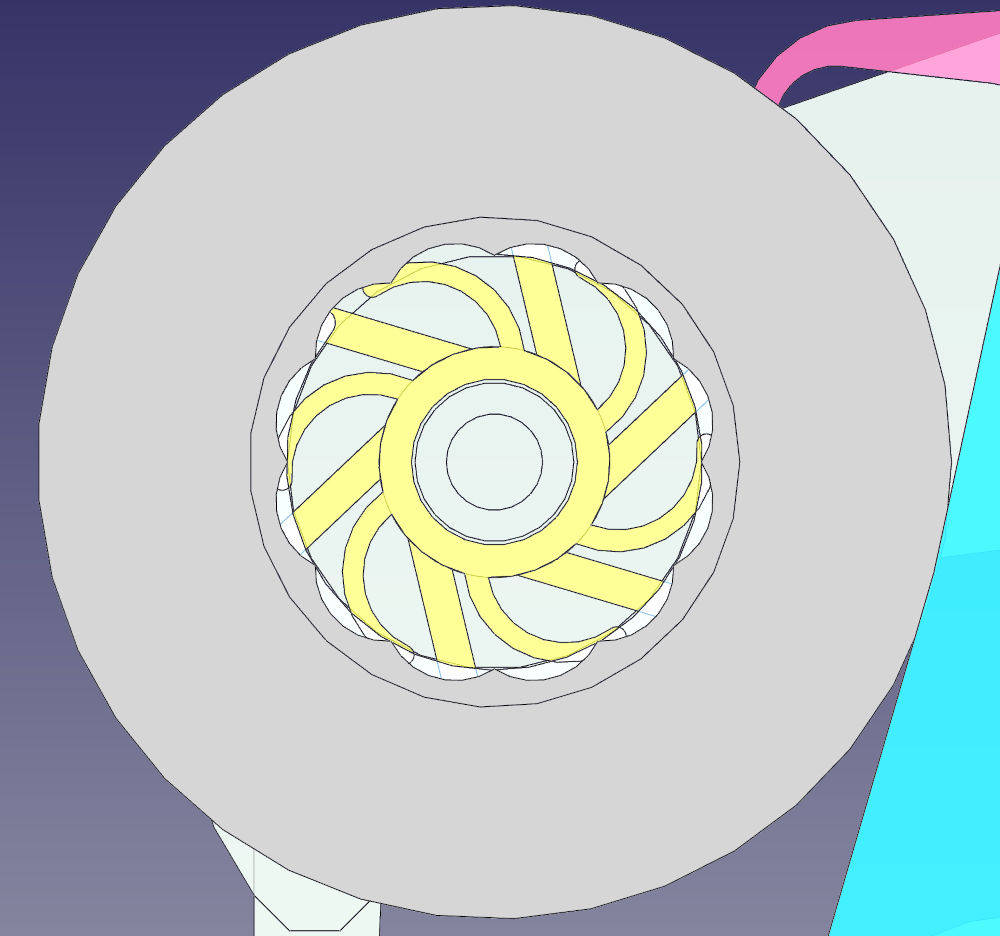
The tensioning gear and spool have been redesigned again to limit slippage regardless of print material. The flex tensioning gear has more pronounced teeth while the spool has a pattern of slight recesses around the inside diameter to provide a more constant holding torque. In the earlier design the point at which the gear slipped inside of the spool was largely dependent on the static friction of the print filament. Now with the bumps the torque is more a function of the print material’s deformation strength, which seems to vary less.
Feeder Dog Changes
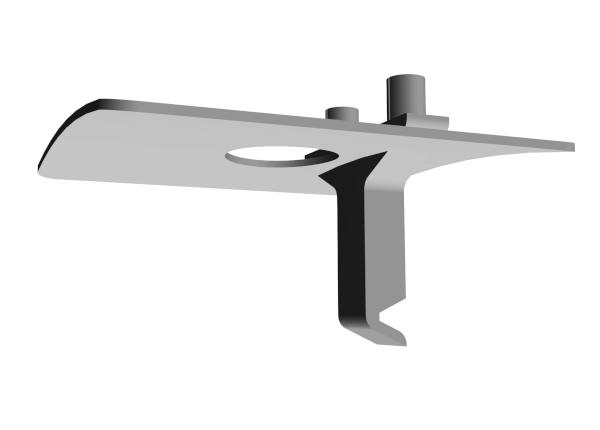
The Feeder Dog must now be pushed down and pulled up since the Feeder Dog Spring was removed. This simplifies the bill of materials. The Feeder Dog’s shape and plastic provide enough spring force to keep everything in place while no external force is being applied.
This dual-direction motion is accomplished on the BTI dual-nozzle head with the Feeder Depressor (included in the repository) placed on one of the nozzles. The large slightly curved area provides a clean background for the up-looking camera.
Machine Mount
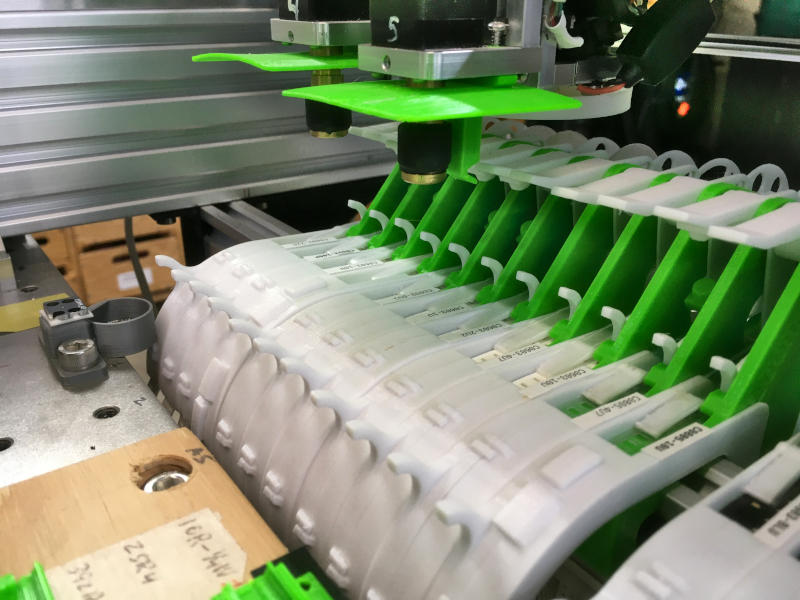
The feeder is designed to mount onto a 20×20 mm extrusion rail. Lowering the tape cover locks the feeder onto the rail, which makes removal easy.
This arrangement has helped to keep the feeders as narrow as possible (13.7 mm for an 8 mm tape). It usually necessitates pulling the white handle forward slightly while clamping the feeder on the rail. And care must be taken when sliding a new feeder in as the spool can easily catch on the neighboring feeders.
Final Thoughts on my PnP Semi-automated Feeder
I’ll be the first to admit it still isn’t perfect, but it is now functional. The bank of these feeders that are on my machine have provided the components for hundreds of boards with a better than 97% reliability.
This feeder has been released as an Open Source Hardware Project. For more information, please see: https://bitbucket.org/Loonatec/pnp_semi-automatic_feeder/
This looks really interesting and promising, i was looking to try this out and adapt this feeder to fit the LumenPnP,
You seem to have updated this quite recently?
However the repository still shows the old files of 2021 and would love to tinker with it if you would like tho share the files!
Should be fixed now. Sorry, it was a Git issue on my end.
Really impressive design and I appriciate that you shared it,
The repository however does not seem to be updated, your picture shows the v9 of your design, but the reposetory is v8 parts, can you double check? Would love to work on this to make it fit for the LumenPnP
Hi,
Great job with the feeders. It would be really great if you can post a video of machine using these feeders. I have started analysing the design. What is the feasibility of this design in supporting wider tape and what can be the maximum height of component
I’ll work on getting some videos up. The FreeCAD model was originally designed to be parametric and in theory supports different feeder widths. But I haven’t tested that feature in a couple of years now, instead focusing on other aspects of its design.
So this needs the dual head now? This will not work with the default liteplacer nozzel?
Also I dont quite see how the tape attaches to the wheel to keep it being removed. thanks!
I run mine with a dual head. I use nozzle 2 to actuate the feeder so that when nozzle 1 is already loaded there is no chance of the part being knocked off.
You can either use the ‘C’ clip to hold the tape or a thin piece of tape. I’ve used both.