What follows is an overview of how to externally trigger our HAB Bounder (version 5) and some example use-cases. The External Trigger is normally used to cut the connection between your payload and the balloon, terminating the flight, based on a signal from your flight computer, a radio or satellite link, or a mechanical switch.
Our HAB Bounder has a two-pin connector on the side labeled “EXT TRIG”. Through these two pins an external device can signal a change of state to the HAB Bounder. This can then be used to trigger a pre-programmed command. The command can configured do things like activate the burn-wires and terminate your latex balloon flight.
External Trigger Configuration
The HAB Bounder’s External Trigger interface is set in the Configuration Section of the Flight.cfg file by inserting one of the two following lines:
ExtTrigger: 1“ExtTrigger: 1” configures the External Trigger to activate on the falling edge of an input signal. It connects an internal 10 KOhm pull-up resistor to the HAB Bounder’s 3.3 VDC supply.
ExtTrigger: 2“ExtTrigger: 2” configures the External Trigger to activate on the rising edge of an input signal. It connects an internal 10 KOhm pull-down resistor to the HAB Bounder’s ground.
SDCardData: Timestamp, System, Position, Ambient, Inputs‘Inputs’ is the dataset that contains the External Trigger’s state. By adding it to the SDCardData collection, as shown above, a ExtTrig column will be added to your Flight.csv data file on the micro-SD card. Data in this column will be ‘0’ if the External Trigger is inactive, ‘1’ when active. The active/inactive state is defined by the earlier “ExtTrigger:” rising/falling setting.
External Trigger Utilization
Once the External Trigger is configured, its state can be used to trigger commands just like the other sensors on the HAB Bounder; such as GNSS position, atmospheric pressure, or elapsed time. While it is inactive the External Trigger signal will be ‘0’, changing to a value of ‘1’ when it is activated. The external trigger signal is available as “Inputs.ExtTrig” in the Command Section.
Compare: Inputs.ExtTrig = 1This can be used to Arm, Trigger, or Disarm a Command when the External Trigger is activated.
External Trigger Input Signal
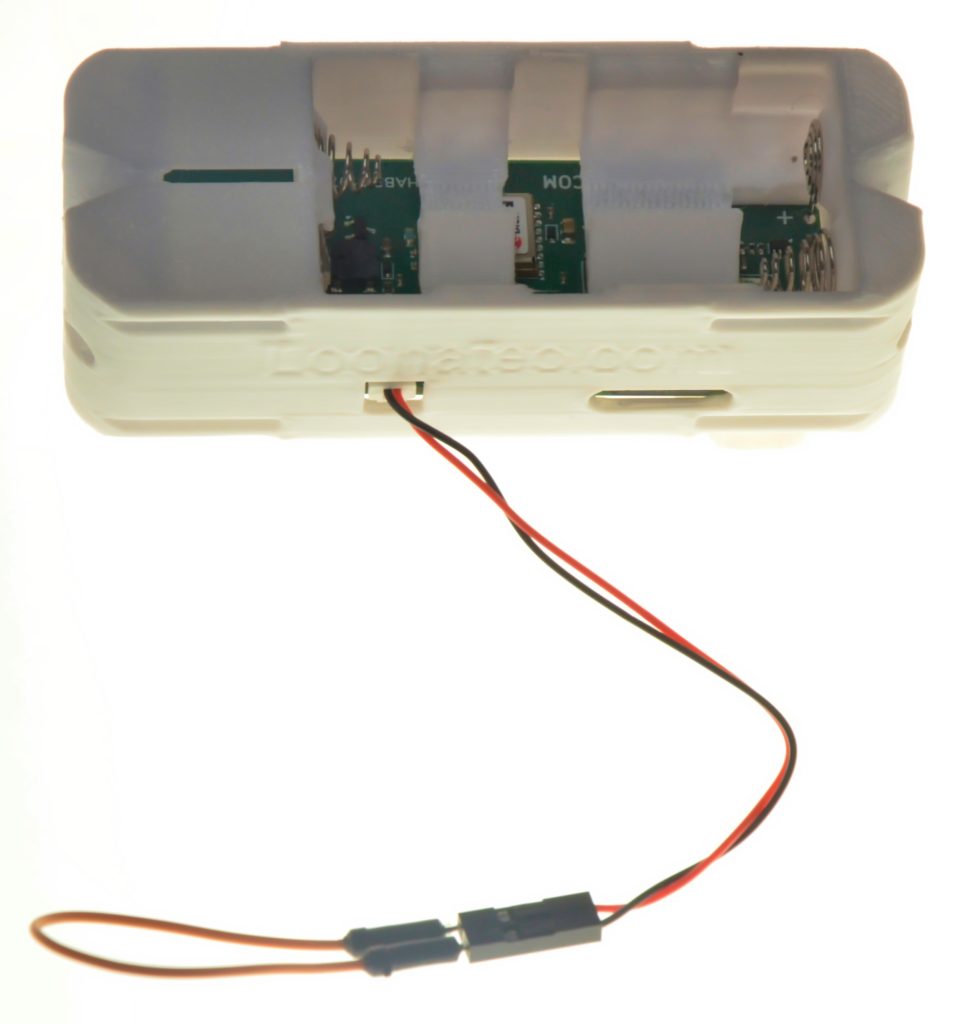
The external trigger utilizes a minimal 2-wire interface through a JST SH 2-pin connector. A short pigtail wiring harness is provided (approx. 100 mm) with our HAB Bounder kit. Activation current is low (<0.5 mA), so a long run of small gauge wire is permitted.
Electrically the two External Trigger pins have over-current, over voltage, and reverse-polarity protection. For the rising trigger, voltages between 2.7 VDC and 5.5 VDC can be used. For the falling trigger, a high-impedance GPIO pin or external open-collector circuit can be used.
The external signal should be maintained for at least 750 ms to ensure reliable activation. The External Trigger’s state is updated twice a second. If found to be activated while checking, then the External Trigger state is then monitored for another 50 ms to ensure spurious noise is rejected and doesn’t cause a false activation.
Example: HAB Bounder with a Micro-switch
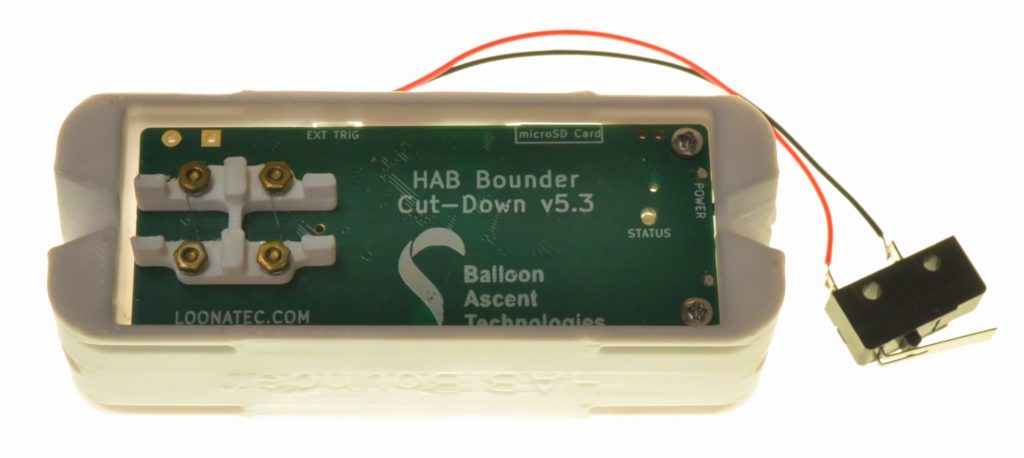
This example monitors for a connection being made between the two External Trigger pins. When this occurs the HAB Bounder will beep 10 times (PlayTone:) and then activate its two burn-wires in sequence (CutLine:) with a 5 second pause in between (Pause: 5.0).
ExtTrigger: 1
HeaterEnableTemp: -20.0
SDCardData: Timestamp, System, Position, Ambient, Inputs
CutterControl:
Command: ExtTrigTest
{
  Conditions:
  {
    Trigger:
    {
        Compare: Inputs.ExtTrig = 0
    }
  }
  Actions:
  {
    PlayTone: 1047, 0.25, 0.25, 10
    Pause: 0.5
    CutLine: 0, 0, 1.2, 10.0, false
    Pause: 5.0
    CutLine: 1, 1, 1.2, 10.0, false
  }
}
Example: HAB Bounder with a Breakable Link
This example monitors for a loss of continuity between the two External Trigger pins by detecting when the External Trigger state becomes inactive. When this occurs the HAB Bounder will beep 10 times (PlayTone:) and then wait for 500 seconds (Pause: 500.0) before activating its two burn-wires in sequence (CutLine:).
This setup can be used to 1) provide precise timing, such as from breaking the connection at launch to when flight termination occurs based on a simple timer, 2) protect against premature line breakage by running a very thin continuity wire along it, 3) detecting a certain balloon size when a very fine wire wrapped around the balloon envelope breaks (a modern variant on this older idea).
ExtTrigger: 1
HeaterEnableTemp: -20.0
SDCardData: Timestamp, System, Position, Ambient, Inputs
CutterControl:
Command: ExtTrigTest
{
  Conditions:
  {
    Trigger:
    {
        Compare: Inputs.ExtTrig = 0
    }
  }
  Actions:
  {
    PlayTone: 1047, 0.25, 0.25, 10
    Pause: 500.0
    CutLine: 0, 0, 1.2, 10.0, false
    Pause: 5.0
    CutLine: 1, 1, 1.2, 10.0, false
  }
}
Example: HAB Bounder with a Xbee Radio
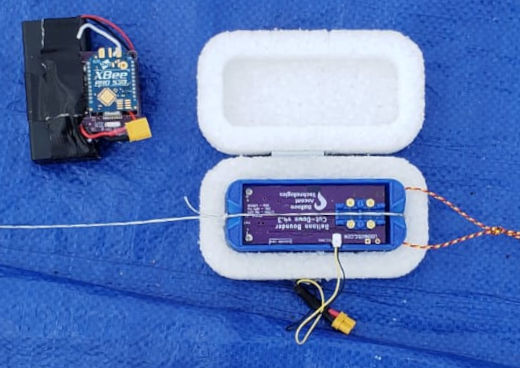
This example allows the HAB Bounder to be remotely controlled via a radio link. The HAB Bounder’s External Trigger monitors one the XBee Radio’s digital-out pins (ex DIO2 or DIO3). When this pin is commanded high by the operator on the ground via the radio link the HAB Bounder will activate its the ExtRadio command. This method was successfully used by a group at the University of Maryland for a stratospheric testing.
In the example code below, the ExtRadio command can be triggered multiple times by this radio link because ExtTrig Is used in both the Arm and Trigger conditions. Once the External Trigger is held low for at least 1 second the ExtRadio command is armed. Continuing to hold it low for another second then triggers the ExtRadio command, as long as the atmospheric pressure is below 800 hPa. To reactivate the ExtRadio command the External Trigger can be returned to its prior high (or high-impedance) state for a second, and then the whole activation sequence repeated.
HeaterEnableTemp: -20
SDCardData: Timestamp, System, Position, Ambient, Inputs
CutterControl:
ExtTrigger: 1
Command: ExtRadio
{
  Conditions:
  {
    Arm:
    {
        Compare: Inputs.ExtTrig = 1, 1
    }
    Trigger:
    {
       AndCollection:
       {
          Compare: Inputs.ExtTrig = 1
          Compare: Pressure.Pressure < 800
       }
    }
  }
  Actions:
  {
    PlayTone: 988, 0.25, 0.25, 10
    Pause: 1.00
    CutLine: 0, 0, 1.2, 10.0, false
    Pause: 5.00
    CutLine: 1, 1, 1.2, 10.0, false
  }
}
Example: HAB Bounder with a PixHawk
This example allows the HAB Bounder to be remotely controlled via a PixHawk Autopilot. The HAB Bounder’s External Trigger monitors one the PixHawk’s digital-out pins (ex PWM9 to PWM14). When this pin goes high, the HAB Bounder activates its burn-wires and terminates the flight. This method was originally used by an AFRL group to release an autonomous glider from a high-altitude balloon.
ExtTrigger: 2
HeaterEnableTemp: -20.0
SDCardData: Timestamp, System, Position, Ambient, Inputs
CutterControl:
Command: ExtTrigTest
{
  Conditions:
  {
    Trigger:
    {
        Compare: Inputs.ExtTrig = 1
    }
  }
  Actions:
  {
    PlayTone: 1047, 0.25, 0.25, 10
    Pause: 0.5
    CutLine: 0, 0, 1.2, 10.0, false
    Pause: 5.0
    CutLine: 1, 1, 1.2, 10.0, false
  }
}